You can witness many changes in URLs whenever you redesign a certain website. This can also happen when you make some changes to its permalink structure. Eventually, this creates a prominent issue for the users and search engine as well. Now this is where WordPress plays its part to provide a straightforward solution. Whenever you go for a redirect, your visitors won’t leave with a negative impact. This will ultimately help you with your search engine rankings. If you are still confused, this read will provide you with a detailed guide.
What Is A Page Redirect?
Page redirect is a set of rules that tells a browser to transfer your visitors from a particular link that they have clicked on to a multiple page. Whenever you redirect a page, there can be possibly 2 outcomes from the end-user side. Either they will observe a redirection message or it will redirect them with no notification.
Different Redirects To Be Aware Of
There are various ways you can use a redirect. The list doesn’t end here. You’ll find some methods used in routine that might be helpful to you.
(A) 301 Permanent Redirect: This redirect is commonly used when you are permanently deleting or moving a page. It can also be useful when you want to shift your website from one URL to another or shifting to a new hosting service.

(B) 302 Temporary Redirects: A temporary redirect used with caution and should be tested for browser compatibility. This will also message the user that the file you are searching for exists, but it is not loading for some specific reason. Proceeding with this redirect will show you an alternative option.
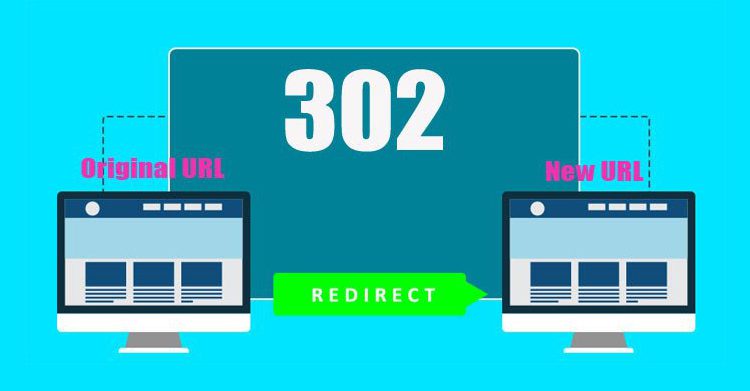
These redirects can have SEO penalties, especially for long-term. So, this is an appropriate answer for temporary websites.
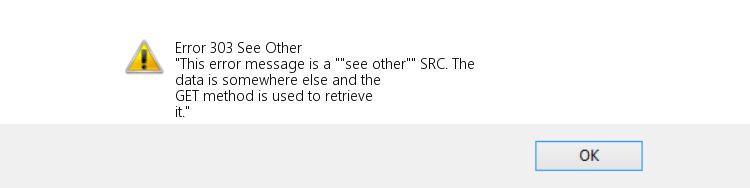
C) 303 See Other: This redirect is very important in terms of security. They commonly use this as a replacement for 302 redirects whenever it goes wrong. This redirect blocks users from submitting the same information again and again. They will be directly redirected to a separate page once they submit their details. You can also avoid refreshing or bookmarking sensitive data like credit card information. So, this stops the user from making mistakes.
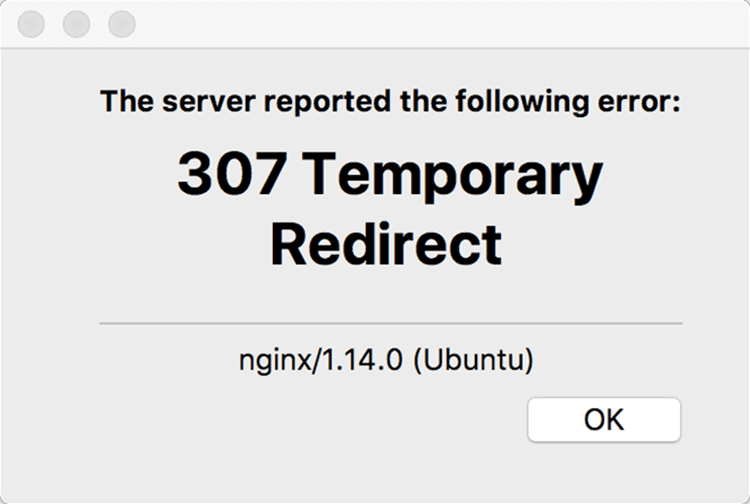
(D) 307: Such redirects work similarly. This redirect is similar in functionality and reason to the 303 redirects. Here, the fundamental difference lies in how it transmits the information. They used a single data exchange method in this case. So, they can call this a true temporary redirect. But a 303 redirect uses two methods.
(E) 308: This is a perpetual redirect similar to 301 redirects. They mainly use it whenever the location of a file has changed. The fundamental difference existing between 308 and 301 is that the 308 can only make use of the POST method, whereas the latter can typically change the HTTP method from POST to GET.
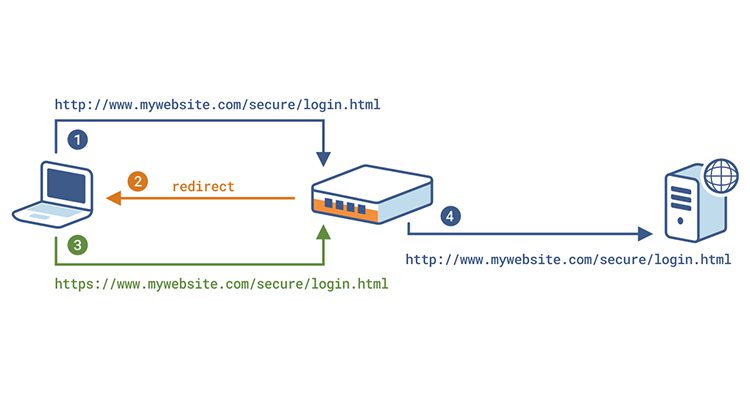
(F) HTTP To HTTPS Redirect: There are several benefits of an HTTPS URL compared to HTTP URL for SEO and security. However, you will need to place a redirect that mandates browsers to display the HTTPS version of your pages.
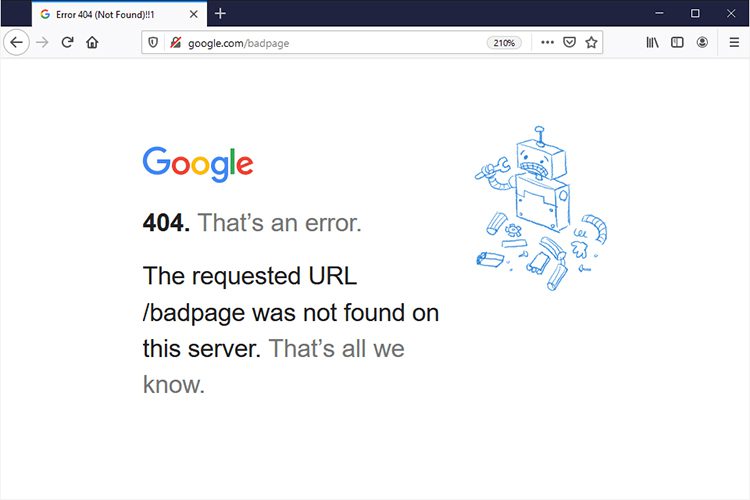
(G) 404 Not Found: This redirects any missing or broken link to another page, just like a 404 error page or the home page. This also allows the users to keep browsing your website even if they try to access any broken page again and again. Some of these redirects consider types to be more common than others. So, it becomes very important to understand how each of the redirects works and functions. Setting them can be a tedious task and here enters the plugins.
Steps To Follow For Redirecting A Page With A WordPress Plugin
It is quite preferable to make use of a plugin. There are several plugins that can be in your list. We are taking an example of the Redirection Plugin.
1. The foremost step is to install and activate the plugin in the control panel of your WordPress website. Once you complete these steps, you need to tap through a few items in the Basic Setup.
2. Once you have completed the above steps, it will redirect you to the Redirection Plugin-Options page.
3. You’ll be able to choose between various features among the options page. You should click on the Redirects link to see how to add a new redirection.
4. Just like adding a new post, you should click on the Add New on the Redirection management page. After the completion, fill up some essential details regarding your redirect. This comprises “Target URL” and “Source URL”. This will also allow you to define the way you want to redirect to handle particular parameters you set and give it to any redirection groups that you have developed.
5. After you are done with the filling up part, you can click on the Add Redirect option.
6. And that’s it.
FINAL WORDS
There are a lot of WordPress management services and WordPress development company out there in the market. They offer you with your WordPress needs and issues.
If you fully fit in such a category, 465Media can help you out. Get in touch with 465Media, right away!